Why Directors Storyboard
Most directing happens before you ever call "action." The storyboard is where you do the hardest creative thinking: deciding what the camera sees, what it doesn't, and how one image leads to the next.
A storyboard is a visual plan for your film. It's a sequence of illustrated frames, like a comic strip, that shows what the camera will see in each shot, how those shots connect, and how the story unfolds visually.
But storyboarding isn't just about making a pretty picture book of your movie. It's a decision-making tool. Every frame you draw forces you to answer questions: Where is the camera? What's in the frame? What's excluded? How does this shot cut to the next one?
Directors storyboard for three reasons:
- To think visually. Screenplays are written in words. Films are made of images. Storyboarding is the process of translating from one medium to the other.
- To communicate with the crew. Your DP, gaffer, production designer, and editor all need to understand what you're going for. A storyboard communicates more in one glance than a page of written descriptions.
- To solve problems early. A storyboard reveals problems (coverage gaps, impossible camera positions, continuity breaks, pacing issues) while they're still free to fix.
Not every director storyboards every shot. Some storyboard only complex sequences (action, VFX, transitions). Others storyboard the entire film. The right amount depends on your project, your budget, and your working style. But every director should know how to storyboard, even if they delegate the drawing.
What You Need Before You Start
Storyboarding is not the first step. If you skip the preparation, your storyboard will be a collection of disconnected images rather than a coherent visual plan.
1. A Finalized (or Near-Final) Screenplay
Storyboarding a script that's still being rewritten wastes your time. Wait until the screenplay is locked or close to locked before committing to storyboards. Minor dialogue changes won't affect your boards, but structural changes (scenes moving, characters appearing or disappearing, locations changing) will force you to redo significant work.
2. A Screenplay Breakdown
Your screenplay breakdown identifies every element in every scene: characters, props, locations, time of day, and special requirements. This information directly informs your storyboard. You can't compose a frame if you don't know what's in the scene.
3. A Shot List
The shot list determines what shots you need for each scene. Each shot on your list becomes one or more storyboard frames. Without a shot list, storyboarding becomes a guessing game. You don't know what you're drawing or why.
4. Location References
If you've scouted your locations (or chosen them from a database), gather reference photos. Storyboard frames should reflect the actual space you're shooting in: door placement, window positions, room dimensions. A beautifully composed frame is useless if the camera position it implies is physically impossible in the actual location.
5. A Clear Visual Strategy
Before drawing individual frames, you should know the visual strategy for each scene: the dominant mood, the camera's relationship to the characters, the rhythm, and how the scene connects to what surrounds it.
The Anatomy of a Storyboard Frame

Every storyboard frame contains visual information and written annotations. Here's what goes into each one:
The Image
The core of the frame: a drawing (or AI-generated image, or photograph) showing what the camera sees.
Frame it like a camera. The edges of your storyboard frame are the edges of the screen. Use the correct aspect ratio for your project:
| Aspect Ratio | Use | Frame Shape |
|---|---|---|
| 16:9 (1.78:1) | Standard HD/TV | Wide rectangle |
| 2.39:1 | Anamorphic widescreen | Very wide rectangle |
| 1.85:1 | Standard theatrical | Wide rectangle (slightly taller than 2.39) |
| 4:3 (1.33:1) | Classic TV, some indie films | Nearly square |
| 1:1 | Social media (rare for film) | Square |
Choose your aspect ratio before you start and use it consistently.
Include key visual information:
- Character positions and body language
- Important props and set pieces
- Lighting direction (indicate with arrows or shading)
- Depth: foreground, midground, background elements
- Camera angle (implied by the perspective in the drawing)
Shot Notation
Below (or beside) each frame, include:
- Scene and shot number (e.g., "14-3" = Scene 14, Shot 3)
- Shot type (WS, MS, CU, ECU, etc.)
- Camera angle (eye-level, high, low, overhead, dutch)
- Camera movement (static, pan L→R, dolly in, tilt up, etc.)
- Duration estimate (in seconds)
Action and Dialogue
A brief description of what happens during the shot:
- Key dialogue (the most important line, not the full speech)
- Physical action (character movement, gestures)
- Sound cues if relevant (phone rings, door slams, music starts)
Movement Arrows
Use arrows within the frame to indicate:
- Solid arrows → Camera movement direction
- Dashed arrows → Character movement direction
- Curved arrows → Pan or arc movements
These arrows are critical. A static frame can't show movement, so arrows are how you communicate dynamics.

Step-by-Step: How to Storyboard a Scene
Let's walk through storyboarding a complete scene, from shot list to finished boards.
The Scene
INT. BOOKSHOP - AFTERNOON

A quiet, cluttered bookshop. MAYA (30s) browses the shelves.
She pulls out a book, flips through it, puts it back.

ALEX (30s) enters the shop. The bell above the door chimes.
Maya looks up. Their eyes meet. A flash of recognition —
they know each other, but neither expected this.

                    ALEX
          Maya?

Maya puts the book she's holding back on the shelf.

                    MAYA
          Hi, Alex.

An awkward silence. Alex approaches slowly.

                    ALEX
          It's been... what, five years?

                    MAYA
          Six.

She holds up the book she was looking at.

                    MAYA (CONT'D)
          You still read García Márquez?
Identify the Beats
Break the scene into moments where something changes: (1) Maya alone in the bookshop, isolation, routine. (2) Alex enters, disruption. (3) Eye contact and recognition, tension, surprise. (4) The exchange, tentative, charged. (5) The book reference, a shared history surfacing.
Reference the Shot List
Each beat maps to one or more shots from your shot list. For this scene, 10 shots cover 5 beats: a mix of wide establishing, medium coverage, close-ups for emotional peaks, and an insert for the key prop.
From the shot list:
| Shot | Type | Description |
|---|---|---|
| 7-1 | WS | Bookshop interior, Maya browsing alone |
| 7-2 | MS | Maya pulling books, putting them back |
| 7-3 | MS | Door opens, Alex enters, bell chimes |
| 7-4 | CU | Maya looks up from shelf |
| 7-5 | CU | Alex sees Maya, stops |
| 7-6 | MS | Alex: "Maya?" |
| 7-7 | CU | Maya puts book back: "Hi, Alex." |
| 7-8 | Two-shot MS | Alex approaches: "Five years?" / "Six." |
| 7-9 | Insert CU | Maya holds up the García Márquez book |
| 7-10 | CU | Maya: "You still read García Márquez?" |
Step 3: Draw (or Generate) Each Frame
Frame 7-1: Wide shot, Maya alone in the bookshop
The frame shows the full bookshop interior. Shelves fill the frame, creating a cozy but cluttered environment. Maya is positioned in the right third of the frame, small against the rows of books. The afternoon light comes through the front window on the left.
Annotation: WS, static, eye-level. Establish the space and Maya's solitude.
Frame 7-2: Medium shot, Maya browsing
Tighter now. Maya fills the right half of the frame, turned sideways. Her hands are on a book she's pulling from the shelf. The shelf runs along the left side of the frame, creating strong vertical lines.
Annotation: MS, static, eye-level. Show her routine, she's comfortable here.
Frame 7-3: Medium shot, Alex enters
The bookshop door occupies the left third of the frame. Alex pushes it open, half-inside, half-outside. A sliver of street is visible behind him. The bell above the door is visible in the upper-left corner.
Annotation: MS, static, eye-level. The disruption. Note: practical bell sound.
Frame 7-4: Close-up, Maya looks up
Maya's face, slightly turned, looking frame-left toward the door (off-screen). Her expression is neutral; she's just looking at who came in. The shelf is blurred in the background.
Annotation: CU, static, eye-level. She hasn't recognized him yet.
Frame 7-5: Close-up, Alex sees Maya
Alex's face, looking frame-right (matching Maya's eye-line). His expression shifts from casual to surprised. He's stopped moving.
Annotation: CU, static, eye-level. Recognition. Hold the moment.
Frames 7-6 through 7-10 continue the same process. Each shot from the list gets a frame showing what the camera sees, with annotations describing the technical specifications and emotional purpose.
Check the Sequence
Flip through frames 7-1 through 7-10 in order. Does the geography make sense? Does the visual energy build? Are there jarring cuts? Is the key moment covered? Check screen direction, shot-size progression, and emotional beats.
Revise
Based on the sequence check: merge shots that overlap (e.g., combine 7-5 and 7-6 into a single CU), add reaction shots where needed (e.g., after "Six."), and consider setup shots for payoffs (e.g., showing the book earlier in Maya's browsing).
Common Storyboard Formats
Thumbnail Storyboards
Small, quick sketches, often 6–12 frames per page. Minimal detail. Used for:
- Personal reference (your own shorthand)
- Quick exploratory passes (trying different approaches)
- Low-budget productions where speed matters more than polish
Best for: Getting ideas down fast, initial exploration.
Presentation Storyboards
Larger frames with more detail, cleaner drawings, and full annotations. Typically 1–4 frames per page. Used for:
- Sharing with crew (DP, production designer, VFX supervisor)
- Client presentations (commercials, music videos)
- Pitching to producers or investors
Best for: Communication, selling the vision.
Shooting Storyboards
Detailed frames that map directly to the shooting schedule. Organized by shooting day and location rather than story order. Include:
- Setup numbers (which shots can be filmed from the same camera position)
- Equipment notes (lenses, rigs, special gear)
- Lighting diagrams
- Blocking overhead views alongside the frame
Best for: On-set reference, production efficiency.
Digital Storyboards
Created with software tools, whether by drawing on a tablet, arranging 3D models, or using AI image generation. Advantages:
- Easy to revise (no redrawing)
- Shareable as interactive presentations
- Can be turned into animatics (storyboards with timing and sound)
- AI generation means you don't need to draw at all
Best for: Modern workflows, collaboration, revision-heavy projects.
Storyboarding Tips for Directors Who Can't Draw
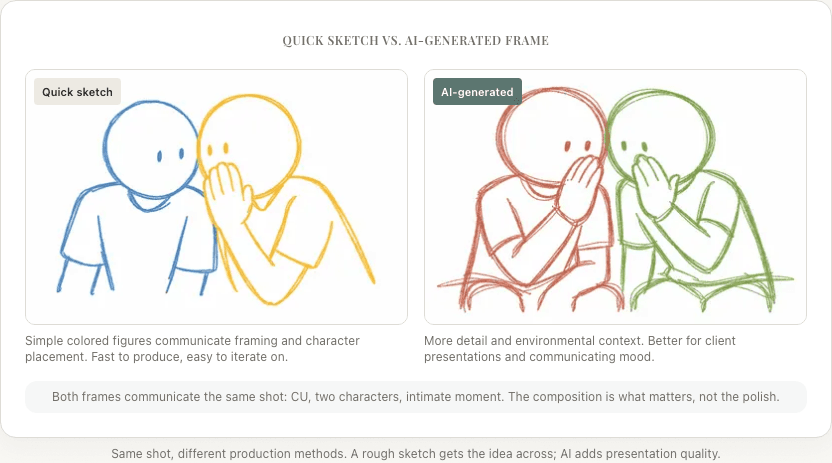
Most directors aren't artists. I certainly am not. And that's fine. A storyboard's job is to communicate information, not win art awards. If the inability to draw has been stopping you from storyboarding, you've been solving the wrong problem.
Stick figures work. As long as the frame communicates the camera angle, subject position, and composition, a stick figure conveys the information. Label who each figure is.
Use simple shapes for environments. Rectangles for doors and windows, circles for tables, triangles for rooflines. You're mapping spatial relationships, not creating architecture renderings.
Focus on the frame, not the art. What matters: what's in the frame and what's excluded. Where the subject is positioned within the frame. The relative size of elements (close-up = subject fills the frame, wide = subject is small in the frame). These communicate even with rough sketches.
Trace reference photos. If you have location photos, trace the basic shapes and add your characters. This grounds your storyboard in real geography.
Use AI generation. Modern AI storyboard tools can generate reference-quality frames from text descriptions. You describe the shot ("close-up of a woman looking up from a bookshelf, warm afternoon light, shallow depth of field") and the AI produces a visual. You refine the description until the output matches your vision. The drawing skill barrier is essentially gone.
From Storyboard to Animatic
An animatic is a storyboard set to time. Each frame is shown for its estimated duration, with rough sound (dialogue, music, effects). It's essentially a very rough edit of your film using storyboard frames instead of footage.
Why make an animatic:
- Test pacing. Does the scene feel too long? Too short? The animatic reveals timing problems that static storyboards can't.
- Test cuts. Do the shots cut together? Are there jarring transitions? The animatic shows you the edit before you have footage.
- Communicate with editors. Your editor can watch the animatic to understand your intended cutting rhythm and shot structure.
- Communicate with composers. If you're working with a composer early, the animatic gives them timing to write to.
Basic animatic process:
- Scan or export your storyboard frames as images
- Import into video editing software (even iMovie or CapCut work)
- Set each frame's duration to match the estimated shot length
- Add scratch dialogue (read the lines yourself or have friends read them)
- Add placeholder music if relevant
- Play it back and take notes
An animatic doesn't need to be polished. It needs to reveal whether your storyboard works as a film, or whether shots need to be added, removed, or reordered.
How Much Should You Storyboard?
There's no single answer. Here's a framework:
Storyboard Everything
When: Big-budget productions, VFX-heavy films, animated films, commercials, music videos, and directors who think visually and use storyboards as their primary creative tool.
Pros: Maximum preparation, no ambiguity on set, clearest communication with crew. Cons: Time-intensive, can feel over-planned, boards may need constant revision as the script changes.
Storyboard Key Sequences
When: Most narrative films. Focus your storyboarding effort on:
- Action sequences and stunts
- VFX sequences
- Complex blocking (many characters, precise choreography)
- Establishing shots and transitions
- Emotionally critical scenes
- Any scene where you have a specific visual idea that needs to be communicated precisely
Pros: Efficient, focuses energy where it matters most. Cons: Less preparation for "simple" scenes (which can still have problems).
Storyboard Nothing (Shot List Only)
When: Documentary-style narrative, vérité, or heavily improvised projects. Some directors prefer to discover shots on set based on what the actors give them.
Pros: Maximum flexibility, spontaneous discoveries. Cons: Slower on set (figuring out shots in real time), higher risk of coverage gaps, harder to communicate with crew in advance.
Most narrative directors fall into the middle category: storyboard the complex sequences, use a detailed shot list for everything else. In my experience, this is the right balance for most projects.
Common Storyboarding Mistakes
Drawing every frame from the same angle. Flip through your boards. If every frame is an eye-level medium shot, your film will be visually flat. Vary your angles, sizes, and camera heights.
Ignoring screen direction. If a character walks left-to-right in one frame and right-to-left in the next (without a motivated reason), the audience gets disoriented. Maintain consistent screen direction across cuts.
Forgetting about the 180-degree rule. In dialogue scenes, keep the camera on one side of the line of action. Your storyboard should reflect this. If Character A is on the left in the wide shot, they should be on the left in their close-up too.
Not including enough transition frames. A camera move needs at least a start frame and an end frame. Complex moves (crane up while dollying forward) may need three or four frames to communicate the motion clearly.
Making frames too detailed too early. Your first pass should be rough thumbnails, exploring ideas quickly. Only invest in detailed frames once you've settled on the shot structure. If you start with polished frames, you'll resist changing them because of the sunk effort, and that's exactly when you need to be most willing to throw things away.
Storyboarding before having a shot list. Without a shot list, you're making shot decisions while drawing, which leads to inconsistency and gaps. The shot list is the bridge between script analysis and storyboard creation.
Storyboarding and the Modern Director
The storyboarding process has evolved dramatically in recent years. AI image generation means directors who can't draw can still produce detailed visual boards. Digital tools make revision instant. Shot list generators create the framework that storyboards flesh out.
But the fundamental purpose hasn't changed: a storyboard is a director thinking visually about how to tell a story with a camera. The tools are better. The thinking is the same.
Whether you're sketching stick figures on index cards or generating cinematic frames with AI, the process forces you to make decisions about composition, rhythm, emphasis, and meaning that directly translate to what happens on set. I've found that the act of storyboarding itself changes how I think about a scene, even when the boards never make it to set.
Ready to speed up your pre-production?
StoryBirdie turns your screenplay into a professional storyboard in minutes. See pricing or jump straight in.
About the author
Aayush is co-founder and director at StoryBirdie. He's a screenwriter, director, stand-up comedian, and full-stack developer — co-founder of Kathmandu's Comedy Tuk Tuk, with directing and writing credits on shorts, music videos, and comedy projects. He builds StoryBirdie on the conviction that storyboarding is expensive, time-consuming, and important — and that a tool for it should serve the filmmaker's vision, not replace it. StoryBirdie is currently in use on a Nepali feature, a Sri Lankan TV commercial, and at one of Nepal's largest production houses. Based in Kathmandu, Nepal.
Keep reading
- How Many Storyboard Panels Per Scene?A practical formula for deciding how many storyboard frames your scene needs. Covers dialogue, action, and VFX scenes with real numbers.·6 min read
- VFX Storyboarding: A Director's GuideHow to storyboard VFX-heavy scenes. Covers pre-viz requirements, green screen planning, and communicating with your VFX team.·9 min read
- What Is a Shot List? Everything Directors Need to KnowA complete guide to shot lists for directors. What they include, how to create one, and why every shoot needs one.·9 min read
- How to Storyboard a Short Film: Step by StepA practical, step-by-step guide to storyboarding your short film. Covers what to storyboard, what to skip, and how to create boards that actually help on set.·8 min read